Before we begin…
I
t’s been a while since we’ve done a proper blog post here. Good news is that we plan to get back on track with more frequent updates for you. So, what better way to start off than with a blog post series! Introducing: Keep your Smart Home Secure.
As you have probably read from the title, this will encompass your home network and what to do to keep it safe. Now, there are a lot of aspects we will cover and some will be very specific, but don’t panic! If you are confused by any of the articles or seek further information, we are here to help. The details on how to contact us will be at the bottom of this post.
Today, we will be looking at one particular aspect of a home network, LAN (Local Area Network). Specifically, we will be giving you a tutorial on how to setup a VLAN (Virtual Local Area Network) on a Draytek Router. Oddly specific? Don’t worry. Later in this series, we will be providing you alternatives which will hopefully cover your make of router (in fact, very soon!).
Another quick little shout out. If you want to stay on top of these upcoming articles, why not subscribe to our newsletter? You’ll receive updates from us on when the next post is out. Furthermore, you’ll also be eligible to some exclusive discounts that you can use on your next repair with us. Not only that, you will also get some expert tips and advice that won’t be in our blog posts. Stay in the know and ahead of the competition.
Never Miss a Post
Subscribe to our newsletter and we will let you know as soon as the next blog post is out.
Plus, get exclusive discounts and tips straight from the team at Computer Assistance.
So, this comes from some recent reading and discoveries. As the popularity of “Smart Homes” increases, so does the potential vulnerabilities that come with it. This all comes from the rise of Internet of Things (IoT) devices being introduced into the market. However, we will get onto this in just a moment. It just so happens that a colleague of mine has a relatively “Smart” home presently. So, with all the fears surrounding potential outside threats to your wireless network, what can be done about it?
But let’s not get ahead of ourselves here. I’m sure that the first question you’re probably asking is:
What is a “Smart Home?”
It’s a rather new term, coined after the introduction of more IoT devices. This refers to a household that contains multiple electronic devices that are all connected wirelessly on the LAN (local area network). Not only that, these devices can be manipulated hands-free and controlled from your smart phone. To give a simple example, a smart home can have:
- Thermostats
- Doors
- Cameras
- Sirens
- Kettles
- Fridges
…And the list goes on. Simply put, a smart home aims to allow the residents to remotely control all their electronic devices, from their phone or computer. You could pop the kettle on before you even get downstairs (although the addition of water into the kettle is still manual).
What are the risks?
A Smart home sounds ideal for most home-owners. It’s convenient, relatively easy to use and makes day-to-day activities that little bit easier. But, it doesn’t come without its own share of vulnerabilities and risks. Like any network (whether it’s an office network, a public wi-fi network, etc), there’s always the possibility that someone could hack into it and steal valuable, personal information from you.
Whilst we won’t go into too many details of the risks here, you can read our blog posts outlining the risks of a Smart Home’s wireless network and what you can do about it.
But for now, we’re focused on one of the smaller tasks which will aid towards improving the security of your home network.
So, let’s see what we can do about it. The first step in improving our network’s security is setting up VLANs to allow specifc devices to talk to each other, without the whole network being potentially compromised if someone attacked. However, I have mentioned VLAN a few times now and it’s about time I give a bit more information on this.
VLANs and you
Firstly, I hear you asking “What is a VLAN?” For those who are just getting started, a VLAN is a network that can connect any devices in your network into a Local Area Network of its own, even if they aren’t connected to the same wire.
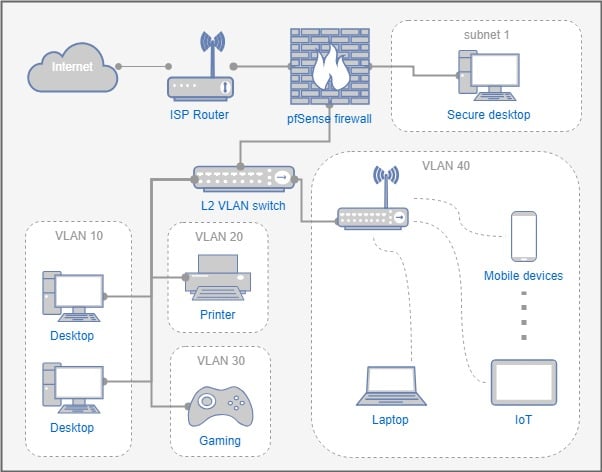
For example, you could have a Local Area Network upstairs, connecting your bedroom PCs and other devices via Ethernet and your TV, phone (whatever you may have) connected to another switch downstairs. Normally, the devices upstairs would not be able to communicate freely to the other devices downstairs, as they are on their own, separate, physical LANs. However, with a VLAN, you could connect your TV to your bedroom PC upstairs and configure it to be its own network, allowing easier communication between the devices, without the need to shuffle cables and wires about. See below for a visual representation of what I just described (if that helps).
Why setup VLAN?
I’m sure you have noticed that by default, all of your devices are able to see each other and communicate. This is because they are on the same subnet and have a gateway (which is required). This, especially for a smart home, is a pretty big security risk. If an attacker was able to infiltrate your wireless network, he would have access to absolutely everything that is shared on that network. This includes, personal information, bank account details, etc. Usually, people isolate certain devices on their own subnet to reduce the risk and access attackers can get. However, they then run into the issue of not having some devices able to communicate with each other.
With VLANs, you are able to create dynamic networks between specific devices, even if they are not on the same subnet physically. These logical networks will improve your security and allow you to control which devices can talk with which. Furthermore, you can configure devices on a VLAN to have no gateway. Meaning you can have devices communicate only to each other in the VLAN, but nothing else. Thus, you can keep your private devices safe and connected to your network, without being at risk to attacks via other devices.
Getting Started with your Draytek
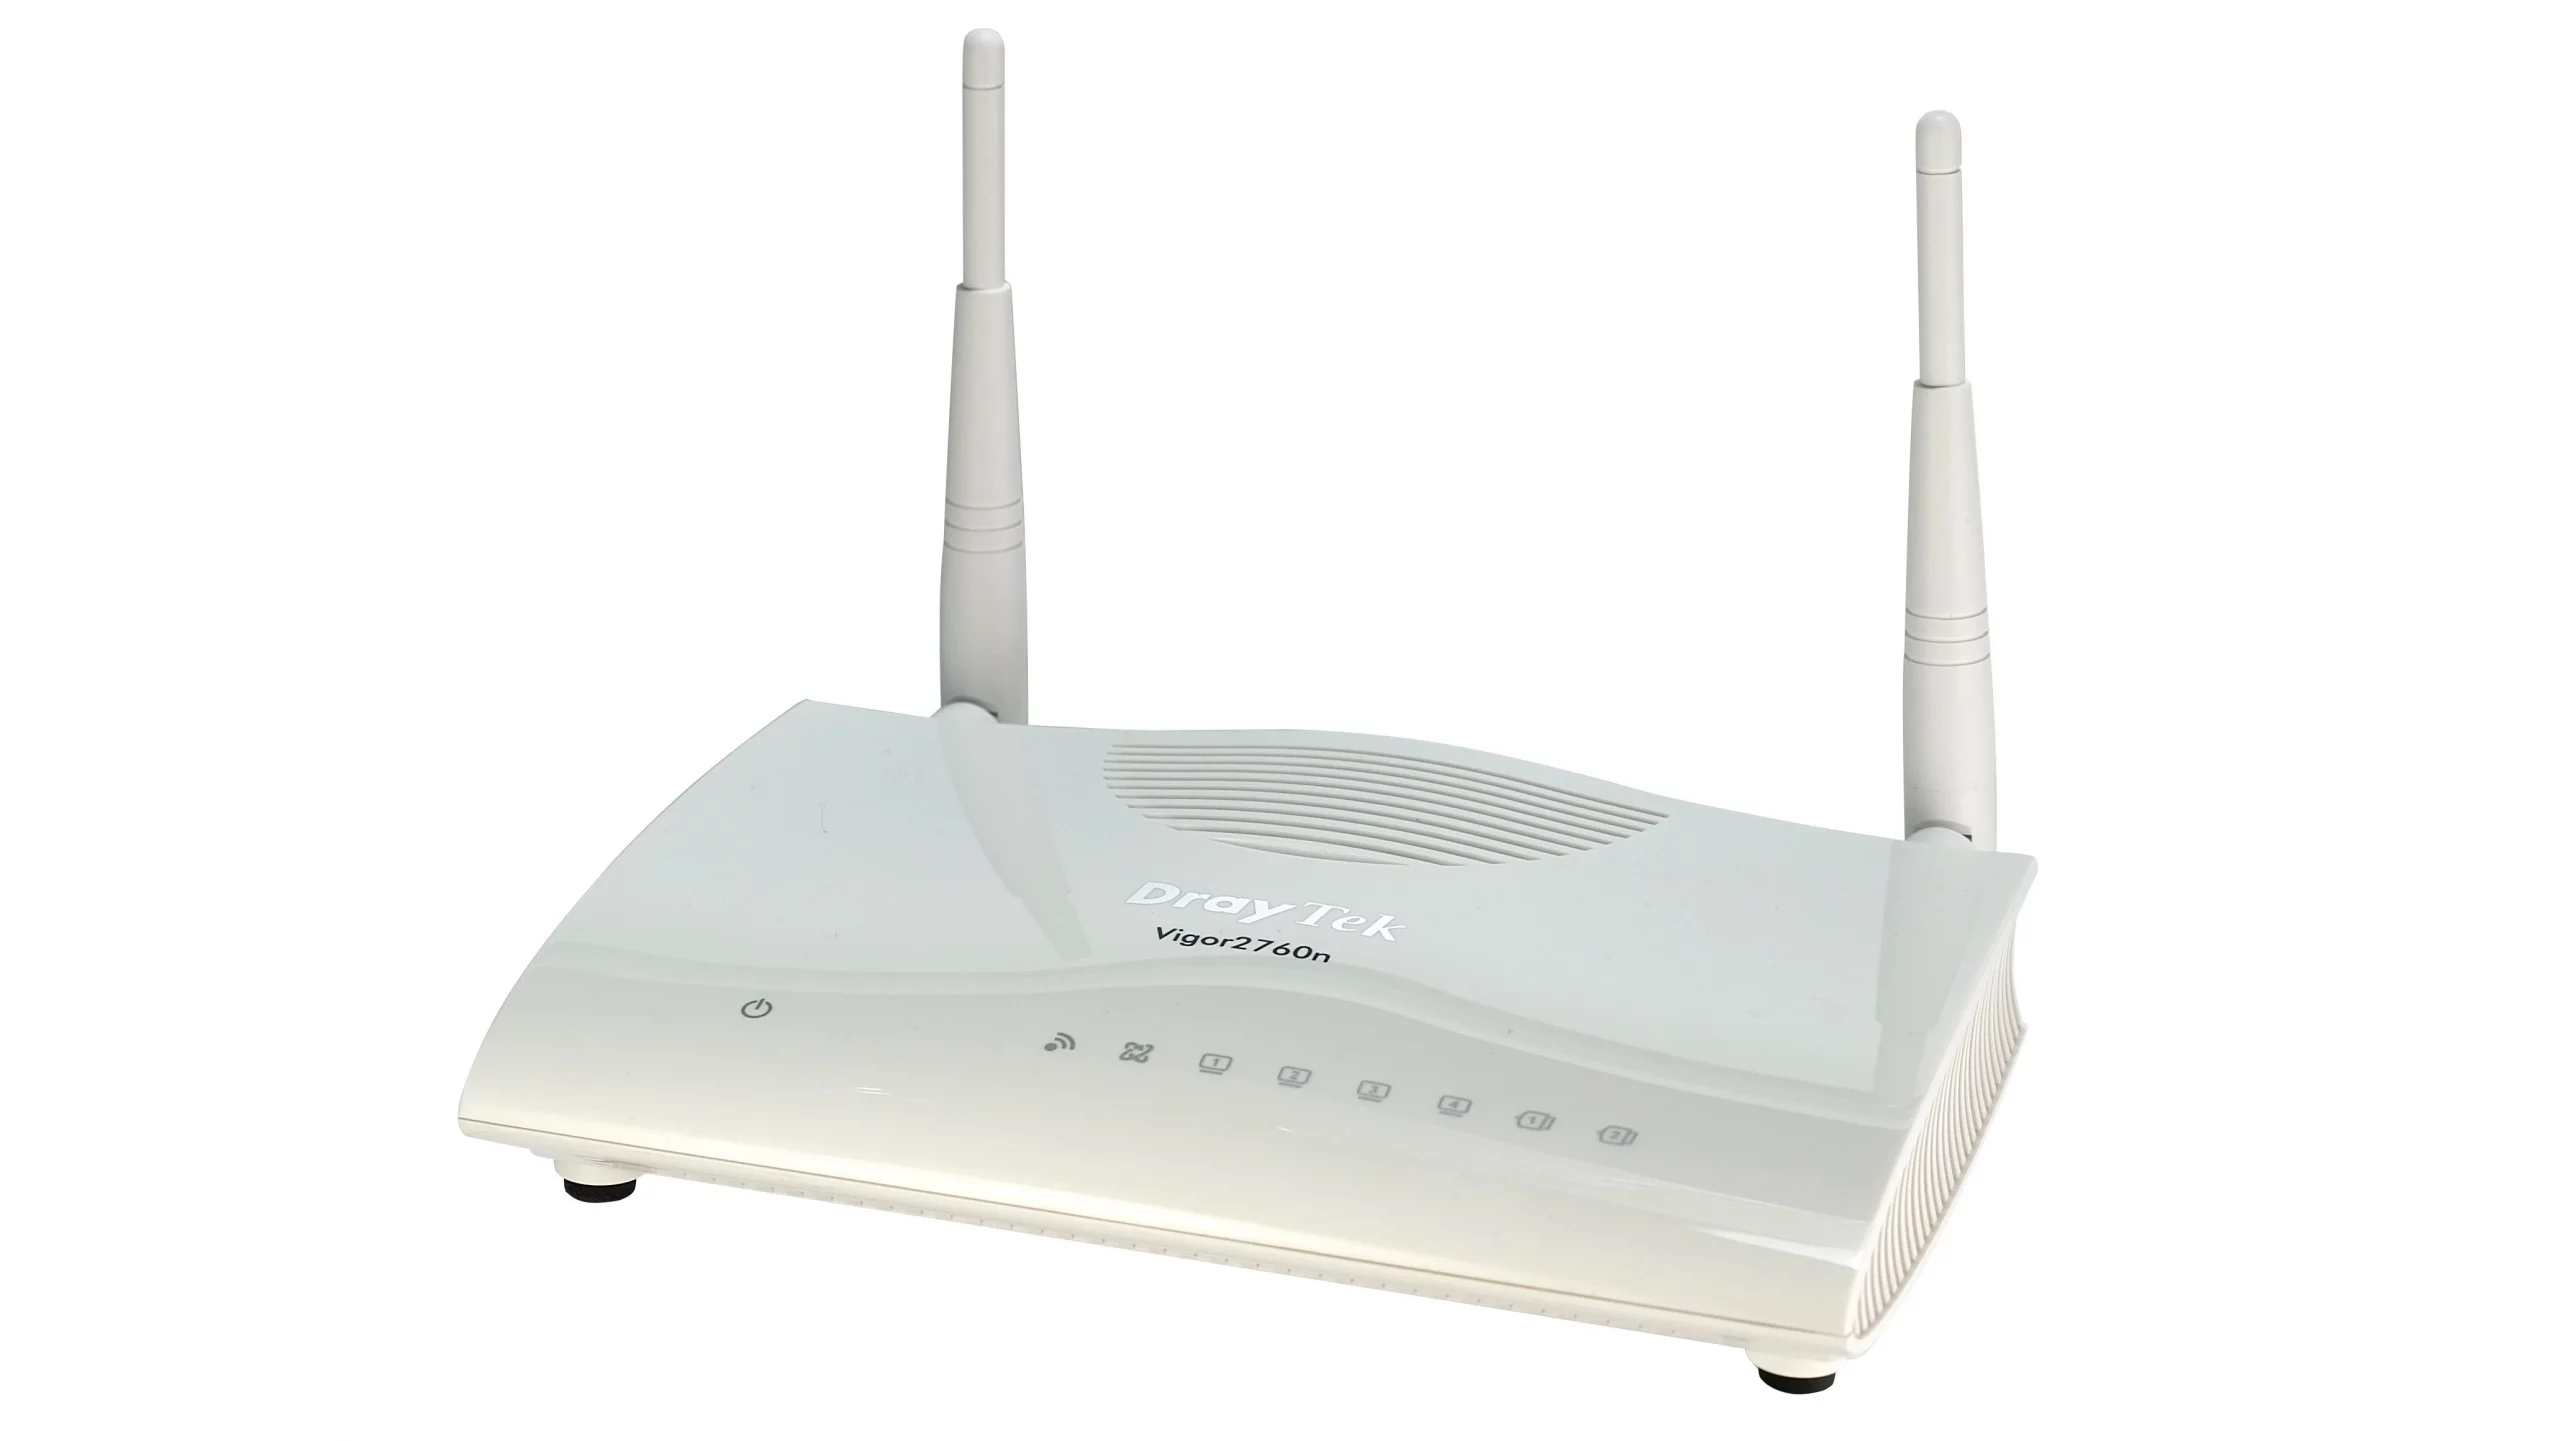
With the explanations out of the way, let’s get on to the tutorial. In this example, we will be using the Draytek Vigor2760n Router as the example. UI differences may apply to the Draytek router you are using. Make sure the Draytek router you have supports VLAN capabilities!
Login to the Router
If you’re not sure how to access your router, open up an elevated command prompt/powershell.
- For Windows 7 users : Open Start -> type in “cmd” -> right-click cmd.exe -> Select Run as Admin
- For Windows 8/10 users: Hit the Windows Key + X -> Select “Command Prompt (Admin)” [Note: This might be “Windows Powershell (Admin)”!]
Once there, type in “ipconfig /all”
This will give you a list of current connections via your network adapters.
Locate the network adapter that is currently active. It should have an ip address assigned to it along the lines of “192.168.X.X”. Once you have located this, search for the row named “Default Gateway”. The IP address this is assigned to is the one you need in order to access the administrator panel for your draytek router.
Once you have the IP to the router, open up a web browser and enter that ip into the address field. You will be greeted with a login window. Enter the administrator user credentials for the router.
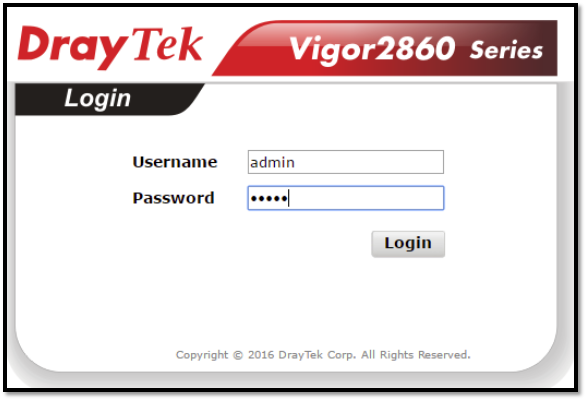
(NB. The default credentials are usually: user – admin, password – admin. If you have already configured your router beforehand and changed these, make sure to enter those instead)
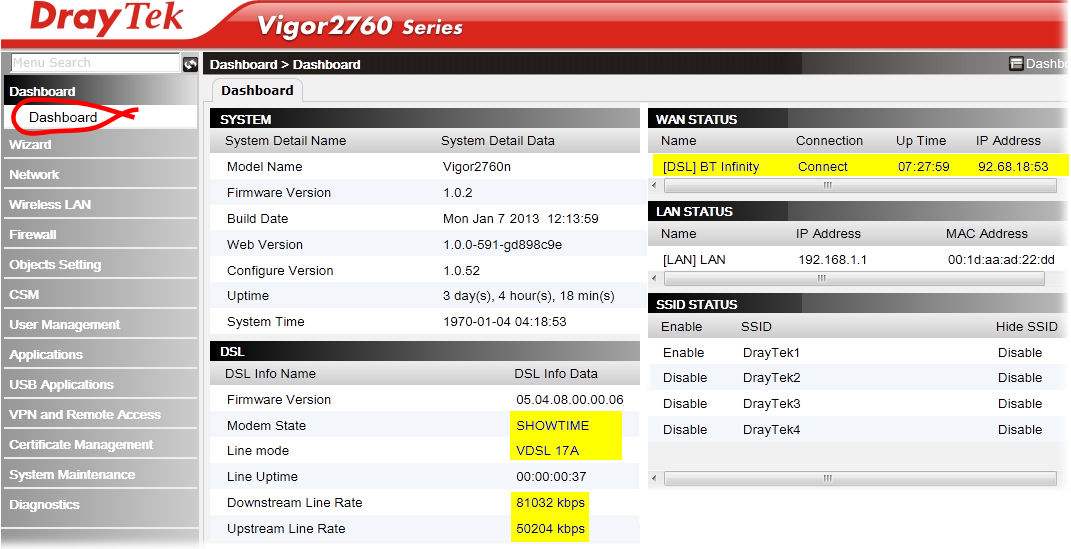
You should now be through the main menu for your Draytek Vigor2760n. This will give you an overview of currently active connections and the status of said connections.
Enable VLAN
Firstly, we need to enable the VLAN functionality on the Draytek.
Click on Lan -> VLAN.
From here, make sure to check the box which says “Enable”. This will require a reboot of the router to complete. (You will need to re-enter your admin user credentials again upon refreshing the page).
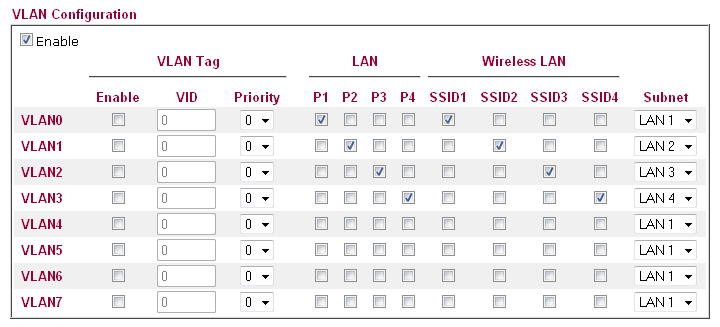
From here, you are given a table of information, which we will break down for you to give you a better idea of what you’re looking at.
Configuring the VLAN
P1 -> P4 refers to the gigabit Ethernet ports located on the router itself.
SSID1 -> SSID4 refers to the wireless local area networks that you have enabled/can enable. (For more information on this, click on Wireless LAN -> General Setup on the main menu).
Subnet refers to the LAN you intend for the VLAN (presented on the left of the table) you’ve selected. For example, VLAN 0 can be put on LAN 1, whereas VLAN 1 could be placed on LAN 2. (There are more settings available for these LANs in LAN -> General Setup. You can also configure the range of IP addresses they can assign to devices connected on that network.).
VLAN0-7 refers to the Virtual local area network you are targeting.
For the vigor2760n, port based VLAN is used. If you are specifically after tag based VLAN, you will need a different model of Draytek, accompanied by a tag based VLAN reading switch. This will allow for a more complex VLAN system, but for a home user, is not needed.
So, let’s say you want your TV downstairs needs to directly talk to your PC upstairs, but your TV uses wireless, as opposed to an Ethernet connection. Not a problem! Simply check the box which corresponds to the Ethernet port (P1-4) that your upstairs PC is connected via. Then, check the box of the wireless LAN (SSID) that your TV is connected to.
Finally, click “OK” to complete the changes (this will require the draytek router to perform another restart to complete the changes).
Done! Now, your TV should be able to detect your PC upstairs, even though they are connected completely differently.
See you next time, where we will delve into the world of DDWRT.
If you feel that you’re still a little confused about the necessity of VLANs for your Smart Home or unsure about some of the changes you need to make on your draytek router, speak to us. We’re more than happy to help you out with your network and tailor the end result to your design.
Feel free to give us a call on 01865 717088 and book a time for us to come on-site to your premise, where we can perform a free network audit of your building. Then, we’ll give you our best recommendation on how to proceed to keep your home’s network safe and secure.
While you’re at it, why not join our newsletter? We’ll send you a message when our next blogpost in this series is up and ready for consuming. Furthermore, you’ll also receive some exclusive tips and information, as well as discounts on device repairs you book in with us! So, check the footer of this page, fill in your e-mail address and click Sign up. That’s all there is to it!
