A Tech Adventure:
Data Recovery of Software RAID5 with BTRFS
T
his week, a rather interesting issue was presented to us. At Computer Assistance, we’re pretty comfortable with more advanced data recovery methods and approaches, however this one was something else.
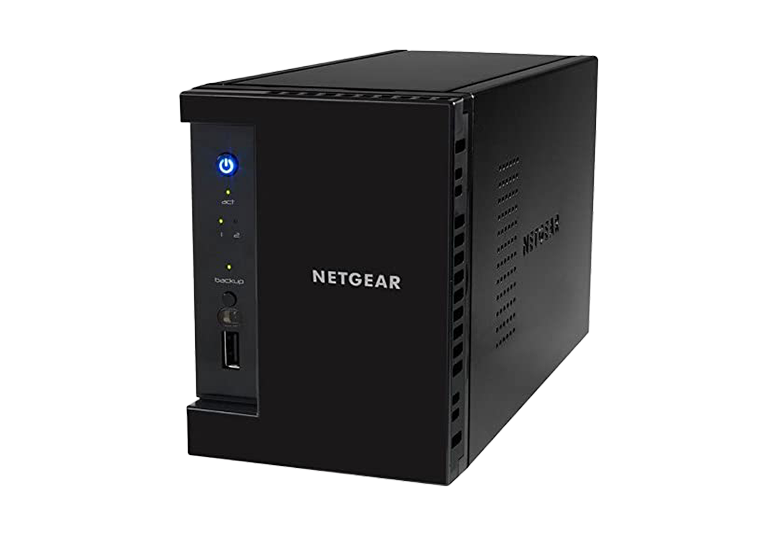
The customer came to us with a Netgear NAS (Network Attached Storage) with 4 HDDs (Hard Disk Drives) configured in RAID5 (Redundant Array of Inexpensive Disks). Now, the user interface (UI) that comes with the Netgear NAS was showing that the RAID had failed. No real technical info presented or error codes to work from. How helpful. So, a challenge, then. As you probably noticed with the title, this was a software based RAID5 array, as opposed to hardware based. That makes things a little trickier. But on top of that, we have no way to access the current array from the NAS whatsoever. So, how are we going to be able to do any data recovery on this?
Stick with this, folks. It’s going to get technical, but extremely interesting.
A quite note. We also provide a flexible backup service for all. Never run into the situation below with a planned, monitored and maintained backup service! Call 01865 717088 for a quick quote and pricing.
Never Miss a Post
Subscribe to our newsletter and we will let you know as soon as the next blog post is out.
Plus, get exclusive discounts and tips straight from the team at Computer Assistance.
The Solution
So, I think this time we’ll start off with the overview of what we did. That way, you can get an idea of the steps we took to recover the data off this array. We’ll be diving into the nitty gritty soon enough.
Firstly, we pulled all 4 drives out of the NAS and carefully labelled each one to correspond with the slot they were in. (i.e 0,1,2,3).
Next, we carefully error scanned each hard drive to look for weak sectors/errors/bad blocks. That way, we can get an idea if there’s an offending drive, or if it was simply a software fault (considering this was a software RAID).
Quick note: When scanning the drives that are potentially failing, do not perform a read/write scan. This can cause the drive to fail completely and make recovery almost impossible!
Next up, we created an image of each drive before continuing our work. This is to ensure we have a copy of the data, should the worst case scenario happen and the drives fail completely. The best tool for us to use in this case was ddrescue. A very powerful data copying tool that copies at the block level. 
From there, we booted into an Ubuntu 16.04 live CD in order to perform some scans for the file system. The more technical are probably thinking here “How could you if the RAID array isn’t available?”. Well…
Lastly, we installed and used a powerful tool known as MDADM to assemble the array from the images.
Top tip! Don’t have access to the machine all the time? You may want to consider installing openssh-server. This will allow you to access the machine remotely and check on the progress! Furthermore, this will also allow you to perform the recovery remotely. Pretty nifty stuff.
So, all of this allowed us to recover the data by rebuilding the array and copying the data off onto a more stable platform temporarily until a new NAS was setup and configured for the customer.
Alright. So, we’ve skimmed over the general process we took in order to perform the data recovery, but let’s get into a little more detail on some of the latter parts of our procedure, since they will require a little more of a technical explanation.
The Technical Stuff
So, let’s go from after we’ve performed the cloning of each hard drive and just booting into the Ubuntu 16.04 live CD.
Firstly, we need to open up terminal (command prompt). From here, let’s go ahead and start the install process for both OpenSSH-Server (if you plan to perform this remotely or don’t have the machine in front of you) and MDADM.
The info in the grey box here shows an example of what you might see. Obviously, since this was done before-hand, the print you’ll receive will be slightly different, but the result is the same. So, let’s make sure and grab MDADM and Openssh-server (if you are planning on doing this remotely).
Another quick note. Ubuntu users by default do not have a password set! You will want to set one up if you’re planning on using SSH. When prompted for what your current password is, just hit return as we don’t have one setup, yet.
Still with us so far? Excellent. Let’s move on and start taking a look at those drives.
ubuntu@ubuntuL~$ sude apt install mdadm openssh-server
Reading package lists... Done
Building dependency tree
Reading state information... Done
mdadm is already the newest version (3.3-2ubuntu7.2)
The following additional packages will be installed:
openssh-client openssh-sftp-server mdadm
Suggested packages:
ssh-askpass libam-ssh keychain monkeysphere rssh molly-guard
3 installed, 0 newly installed, 0 to remove and 389 not upgraded.
Need to get 963 kB of archives.
After this operation, 0 B of additional disk space will be used.
Do you want to continue [Y/n] _
Examining the drives
Now that we have MDADM installed, we can now use it to start taking a look at the mounted drives in the system. So, let’s run the command ” mdadm –examine /dev/sdd3 “.
The first grey box again shows an example of what we’re looking at in this example here. We can see from the first bit of print that it’s a RAID5 array with 4 drives (we knew this already, but it’s showing the power of MDADM). Feel free to do this will all the drives, to ensure you have the right ones when re-assembling the RAID array.
Also note, we are doing these with the images of the drives that we created prior, not with the original drives. This is to ensure we don’t stress the original drives further and run the risk of further data loss!
root@ubuntu:~# mdadm --examine /dev/sdd3
/dev/sdd3:
          Magic : a92b4efc
        Version : 1.2
    Feature Map : 0x0
     Array UUID : 9aa649f2:4035e044:10f2f9a3:ed428533
           Name : 2fe64b0c:data-0
  Creation Time : Mon Oct 26 22:45:07 2015
     Raid Level : raid5
   Raid Devices : 4

 Avail Dev Size : 7804333680 (3721.40 GiB 3995.82 GB)
     Array Size : 11706500352 (11164.19 GiB 11987.46 GB)
  Used Dev Size : 7804333568 (3721.40 GiB 3995.82 GB)
    Data Offset : 262144 sectors
   Super Offset : 8 sectors
   Unused Space : before=262064 sectors, after=112 sectors
          State : clean
    Device UUID : 999b4ed7:d226695b:7019db2e:3f4ece02

    Update Time : Wed Jul 26 08:19:46 2017
       Checksum : 7c27429f - correct
         Events : 970

         Layout : left-symmetric
     Chunk Size : 64K

   Device Role : Active device 1
   Array State : AAAA ('A' == active, '.' == missing, 'R' == replacing)
Please note, the part sdd3 may differ for you, depending where your drive is visible. Make sure you know what directory your drive is on!
Next up, let’s try an assemble this array. We are going to attempt an automatic assembly here (assuming you have all 4 drives visible in Ubuntu). Think of this as autodiscovery of the RAID drives. So, let’s run “mdadm –assemble –scan”
ubuntu@ubuntu:~# sudo mdadm --assemble --scan
mdadm: /dev/md/1 has been started with 4 drives.
mdadm: /dev/md/data-0 has been started with 4 drives.
Quick note: md/1 was where the operating system was stored and md/data-0 was where the data was located.
Huzzah! As you can see from the second grey box here, we’ve managed to successfully assemble the RAID5 array automatically. So, we’ve established which drives contain part of the RAID5 array and successfully assembled it together again. Next up, let’s see if we can see the data on it.
Recovering the Data
From here, we want to locate where the data partition is. Let’s run “ls -las /dev/md*” to list the volumes in our newly assembled RAID.
ubuntu@ubuntu:/home/ubuntu# sudo ls -las /dev/md*
0 brw-rw---- 1 root disk 9,   0 Aug 24 13:03 /dev/md0
0 brw-rw---- 1 root disk 9,   1 Aug 24 13:04 /dev/md1
0 brw-rw---- 1 root disk 9, 127 Aug 24 13:05 /dev/md127
Ok, we’ve got three to check. So, let’s go through them one by one and look for our data volume. As far as we know, it’ll be the size of the RAID5 array with a total size of ~12TB (4x4TB in RAID5). We’ll be using “sudo mdadm -D”, followed by /dev/md1/ /dev/md0 and /dev/md127.
ubuntu@ubuntu:/home/ubuntu# sudo mdadm -D /dev/md1
/dev/md1:
Version : 1.2
Creation Time : Tue Jul 18 12:46:02 2017
Raid Level : raid10
Array Size : 1046528 (1022.17 MiB 1071.64 MB)
Used Dev Size : 523264 (511.09 MiB 535.82 MB)
Raid Devices : 4
Total Devices : 4
Persistence : Superblock is persistent

Update Time : Fri Jul 21 14:43:35 2017
State : clean
Active Devices : 4
Working Devices : 4
Failed Devices : 0
Spare Devices : 0

Layout : near=2
Chunk Size : 512K

Name : 2fe64b0c:1
UUID : a2af1e47:6366d2bc:20a7d517:cc866a6c
Events : 19

Number Major Minor RaidDevice State
0 8 34 0 active sync set-A /dev/sdc2
1 8 50 1 active sync set-B /dev/sdd2
2 8 2 2 active sync set-A /dev/sda2
3 8 18 3 active sync set-B /dev/sdb2
Hmm, too small to be our data volume. Let’s try md0.
ubuntu@ubuntu:/home/ubuntu# sudo mdadm -D /dev/md0
/dev/md0:
Version : 1.2
Creation Time : Mon Oct 26 22:45:07 2015
Raid Level : raid1
Array Size : 4190208 (4.00 GiB 4.29 GB)
Used Dev Size : 4190208 (4.00 GiB 4.29 GB)
Raid Devices : 4
Total Devices : 4
Persistence : Superblock is persistent

Update Time : Thu Aug 24 13:04:48 2017
State : clean
Active Devices : 4
Working Devices : 4
Failed Devices : 0
Spare Devices : 0

Name : 2fe64b0c:0
UUID : 4ce0ad55:1f2eba63:39e8b91d:3fd60b15
Events : 1194

Number Major Minor RaidDevice State
4 8 49 0 active sync /dev/sdd1
5 8 33 1 active sync /dev/sdc1
6 8 1 2 active sync /dev/sda1
7 8 17 3 active sync /dev/sdb1
Slightly larger, but nowhere near the target amount. It must be md127. But, let’s check it and make sure.
ubuntu@ubuntu:/home/ubuntu# sudo mdadm -D /dev/md127
/dev/md127:
Version : 1.2
Creation Time : Mon Oct 26 22:45:07 2015
Raid Level : raid5
Array Size : 11706500352 (11164.19 GiB 11987.46 GB)
Used Dev Size : 3902166784 (3721.40 GiB 3995.82 GB)
Raid Devices : 4
Total Devices : 4
Persistence : Superblock is persistent

Update Time : Wed Jul 26 08:19:46 2017
State : clean
Active Devices : 4
Working Devices : 4
Failed Devices : 0
Spare Devices : 0

Layout : left-symmetric
Chunk Size : 64K

Name : 2fe64b0c:data-0
UUID : 9aa649f2:4035e044:10f2f9a3:ed428533
Events : 970

Number Major Minor RaidDevice State
4 8 35 0 active sync /dev/sdc3
1 8 51 1 active sync /dev/sdd3
2 8 3 2 active sync /dev/sda3
3 8 19 3 active sync /dev/sdb3
ubuntu@ubuntu:/home/ubuntu#
Bingo. 11.98TB of space. So, that looks like our data volume. Let’s start the data recovery process.
From the start of the job, we know that the file system is corrupted. So, the following was a bit of a longshot. However, let’s try and mount md127. We can do with with the classic “sudo mount /dev/md127 /data”
ubuntu@ubuntu:/home/ubuntu# sudo mount /dev/md127 /data/
mount: wrong fs type, bad option, bad superblock on /dev/md127,
       missing codepage or helper program, or other error
Well, no luck there. We can run dmesg for more information on the error. For those interested, this is what came up:
[  752.433528] md127: detected capacity change from 0 to 11987456360448
[  783.713605] Btrfs loaded, crc32c=crc32c-generic
[  783.714350] BTRFS: device label 2fe64b0c:data devid 1 transid 47594 /dev/md127
[  783.714759] BTRFS info (device md127): disk space caching is enabled
[  783.788214] BTRFS error (device md127): bad tree block start 8591023754258257750 18261714698240
[  783.791346] BTRFS error (device md127): bad tree block start 7476525050543419467 18261714698240
[  783.791357] BTRFS warning (device md127): failed to read tree root
[  783.808104] BTRFS: open_ctree failed
[ 9149.368917] perf: interrupt took too long (2503 > 2500), lowering kernel.perf_event_max_sample_rate to 79750
[15037.840623] BTRFS info (device md127): disk space caching is enabled
[15038.911241] BTRFS error (device md127): bad tree block start 8591023754258257750 18261714698240
[15038.911517] BTRFS error (device md127): bad tree block start 7476525050543419467 18261714698240
[15038.911530] BTRFS warning (device md127): failed to read tree root
[15038.932070] BTRFS: open_ctree failed
So, this gives us a little more insight as to why the mount has failed. Let’s for now try doing a dry run of a restore using BTRFS. This will allow us to see if and where the restore fails. We’ll be using -D for Dry Run mode, -i to ignore the errors and -v to increase the level of verbosity.
ubuntu@ubuntu:~# sudo btrfs restore -i -D -v /dev/md127 /dev/null
checksum verify failed on 18261714698240 found FCAF424E wanted 5A4DE202
checksum verify failed on 18261714698240 found FCAF424E wanted 5A4DE202
checksum verify failed on 18261714698240 found EBF0F3FF wanted B29195E1
checksum verify failed on 18261714698240 found FCAF424E wanted 5A4DE202
bytenr mismatch, want=18261714698240, have=8591023754258257750
Couldn't read tree root
Could not open root, trying backup super
checksum verify failed on 18261714698240 found FCAF424E wanted 5A4DE202
checksum verify failed on 18261714698240 found FCAF424E wanted 5A4DE202
checksum verify failed on 18261714698240 found EBF0F3FF wanted B29195E1
checksum verify failed on 18261714698240 found FCAF424E wanted 5A4DE202
bytenr mismatch, want=18261714698240, have=8591023754258257750
Couldn't read tree root
Could not open root, trying backup super
Again, no luck. However, if this dry run would have succeeded, we could do the real run and complete the restore from here. Unfortunately, we will need to take a few more steps before we can attempt a restoration, it seems.
Working around the corrupt File System
We’ve hit a bit of a snag here. Whilst we were able to rebuild the RAID5 array to a degree and find the data volume, we weren’t able to mount it. Furthermore, the results of the dry run also proved ineffective. We’ll need to find other alternatives to recover this data.
We are going to need to find another tree location (a.k.a Well blocks) to restore from. However, in order to to this, we will need to run “btrfs-find-root”.
So, the way this will look is something along the lines of: “nohup btrfs-find-root /dev/md127 &> /root/btrfs-find-root &” . If you want to monitor the progress of this, you can use “tail -f/root/btrfs-find-root”
Next, we’ll need to create a little script. This script will create a loop that will go through all the “well blocks” and attempt a restore. From there, we’ll see how many files and folders we manage to recover.
Here’s what the script looks like:
vim /root/btrfs-restore-from-tree.sh

#!/bin/bash
for i in `tac /root/btrfs-find-root | grep 'Well block' | awk '{print $3}' | sed "s/(.*$//"`; do echo "--- Well block $i ---"; btrfs restore -F -D -i -v -t $i /dev/md127 /dev/null 2>&1 | tee /root/rest-btrfs-restore-wb-$i.1; done
Let’s not forget to make the script executable with:
chmod +x /root/btrfs-restore-from-tree.sh
Once this is done, we can now run this script in the background and let it get to work. Let’s go ahead and do this and find out which well block has the most output for recovery.
nohup /root/btrfs-restore-from-tree.sh &> /root/restored-from-tree &
Almost there now. We can use one of the following commands to find out which well block / tree location has the most restored files & folders. This is represented by the largest rest* file present.
ls -lisahSr /root/rest*
for i in /root/rest*; do echo -n "$i : "; cat $i | grep "^Restoring" | wc -l; done;
for i in /root/rest*; do echo -n "$i : "; cat $i | grep "^Restoring" | wc -l; done | sort -nk3
So, this is where it gets trickier. When you get the numbers of the well block, you will want to assort them in descending order, largest first. The rule of thumb here is, the larger the well block number, the more recent the data is inside of it. So, you will most likely want to recover the most recent data. Therefore, grab the largest well block number you can see in your results.
Got it? That’s great. Now you can go ahead and restore from it by using the following:
btrfs restore -i -o -v -t 123456789123 /dev/md127 /USB
Please note: This will take A LOT of time. This is only perpetuated by the chance of the recovery getting stuck at user input commands. On some systems like ReadyNAS, there is an -F option you can add to the above restore command that will automatically answer YES to request made by the recovery. However, if you choose to use this guide and try with Ubuntu, be aware that Ubuntu DOES NOT have this option.
Phew, bit of a read this one. But, the good news is that after this recovery attempt, we were able to get most of the corrupted files and folders back. Needless to say the customer was extremely happy with our efforts. Moreover, we had the opportunity to try some slightly different recovery techniques on a difficult source. We hope this helps people out in some shape or form in the future, should you run into a similar issue.
Until next time!
Read the above data recovery, but still have a few lingering issues? Why not treat yourself to peace of mind, with Computer Assistance? We offer remote backup solutions, monitoring and maintenance. Never lose a backup, or data, again!
Feel free to give us a call on 01865 717088 and you’ll receive a call from a technician who will be able to sort out all of your problems. We also give expert advice on the next move, whatever the IT problem may be.
While you’re at it, why not join our newsletter? We’ll send you a message when our next blogpost is up and ready for consuming. Furthermore, you’ll also receive some exclusive tips and information, as well as discounts on device repairs you book in with us! So, check the footer of this page, fill in your e-mail address and click Sign up. That’s all there is to it!